Hiển thị các bài đăng có nhãn Thủ thuật blog. Hiển thị tất cả bài đăng

Tùy chỉnh BIOS để khởi động máy nhanh hơn bình thường

Khi máy tính bạn có nhiều thiết bị để boot khởi động thì vô tình sẽ làm cho máy tính của bạn tăng thêm thời gian khởi động. Ví dụ như ổ cứng, ổ đĩa CD/DVD, network.. thì khi máy tính khởi động sẽ detect tất cả các thiệ bị này thì mới có thể boot được vào hệ điều hành. do đó để giảm thời gian khởi động máy thì bạn có thể vào BIOS để tùy chọn các thiết bị để boot vào hệ điều hành.
Tùy vào từng loại main mà cách để truy xuất vào BIOS khác nhau, các máy tính khi bật trên màn hình khởi động đều hiển thị hướng dẫn để truy xuất BIOS. Thông thường thì là phím Delete hoặc F2 hoặc F10 hoặc F12…(Nếu không được thì xem sách hướng dẫn đi kèm).
Nếu máy tính của bạn không có ổ đĩa mềm, thì bạn chuyển mục Legacy Diskette: thành Disabled để không cho máy tính tìm đến mục này khi khởi động.
Kiểm tra cách thiết lập ổ đĩa khởi động, ưu tiên cho ổ đĩa cứng khởi động đầu tiên. Di chuyển vùng sáng sang thẻ Boot. Chọn Hard Drive đưa lên trên cùng, tùy theo từng loại máy mà bạn dùng các phím -/+ hoặc F5/F6 để đưa mục này lên trên. (Hình bên dưới)
Chọn F10 để Save and Exit. Sau đó khởi động lại máy tính và kiểm tra thời gian khởi động có nhanh hơn không?
Read More...

Chỉnh gpedit để tăng tốc độ duyệt web lên 30%

Hiện nay web là một phần của cuộc sống đối với các bạn trẻ hiện nay, thông qua internet bạn có thể biết được thông tin nhanh chóng và biết được rất nhiều thông tin. Nhưng nếu đường truyền internet nhà bạn quá yếu hay máy của bạn chậm thì sẽ dẫn đến việc lướt web gặp vấn đề. Mỗi lần mở một trang báo hay một trang phim nào đó thì phải ngồi đợi cả buổi trời mới có thể vào được.

Dưới đây làm mẹo nhỏ giúp bạn cải thiện 20% tốc độ lướt web thông qua tùy chỉnh trong gpedit.

Thực hiện như sau:

- Vào start -> run gõ lệnh gpedit.msc


- Tiếp theo bạn nhìn bên tay phải khung cửa sổ vừa hiện ra click chọn Administrative Templetes>Network>QoS Packet Scheduler


- Nhìn bên khung bên phải  tìm Limit Reservable Bandwidth. Tiếp theo Click đúp vào Limit Reservable Bandwidth.

Tại cửa sổ hiện lên trong tab explain click vào nút chọn Enable thay vì  not configured.Sau đó sửa mục reservable banwith từ 20 thành 0 . Như thế là bạn đã tăng tốc độ duyệt web lên 20%
Read More...

Tự động bắt link redirect cho blogspot giống adf.ly


Tự động bắt link quảng cáo rất là hữu ích cho các trang bạn muốn redirect. sẽ không cần phải chèn thêm cái link trang redirect nữa mà nó sẽ tự động bắt link ngay.
Hôm nay mình sẽ hướng dẫn thêm cho các cải tiến trang redirect tự động bắt link giống như mình đang dùng cho các link mediafire.com rất tốt.

ở đây mình sử dụng code chèn link mediafire như thế này
<a href="http://www.mediafire.com/?jtzb4wwf4ow0naq" target="blank">http://www.mediafire.com/?jtzb4wwf4ow0naq</a>
nó sẽ tự động thêm trang redirect http://dl.tinhoc24h.info/?url= vào trước link http://www.mediafire.com/?jtzb4wwf4ow0naq trong thẻ href="" này
Bạn bấm vào link bên xem demo nhé: http://www.mediafire.com/?jtzb4wwf4ow0naq
Mod này mình cover từ adf.ly nên cũng ko biết có lỗi gì không vì mình đang dùng rất tiện
1.Để thực hiện việc tự động bắt link bạn hãy làm 1 trang redirect như ở bài  Hướng dẫn tạo trang redirect cho blogspot
2.Tiếp theo bạn download file link-converter.js tại đây  về
3. mở tệp link-cover.js ra  tìm đến các dòng
http://dl.tinhoc24h.info/?url= sửa thành url trang redirect của bạn và up lên host nào đó để lấy link .js nha
ví dụ: http://dl.tinhoc24h.info/?url= sử thành http://yourdomain.com/?url=
4. vào blogger Thiết kế -> Chỉnh sửa HTML -> mở rộng tiện ích
và tìm đến thẻ </head> và chèn thêm cái code sau vào trước nó:

<!--Automatic Replace Redirect Link By Tinhoc24h.info Start-->
<script>
var redirect = 'int';
var domains = ['mediafire.com', 'otherlink.com',];
</script>
<script src="http://yoursite.com/link-converter.js"></script>
<!--Automatic Replace Redirect Link By Tinhoc24h.info End-->


sửa lại các link bạn muốn site tự động bắt. các link trong thẻ này có thể thêm hoặc xóa bớt


var domains = ['mediafire.com', 'otherlink.com',];


sửa lại dòng này cho đúng đường dẫn chưa file link-converter bạn vừa mới sửa và up lên host

http://yoursite.com/link-converter.js
5.Lưu template lại
Test thử bài viết xem thế nào.
với thủ thuật này các bạn chỉ cần chèn link với dạng
<a href="http://www.mediafire.com" target="blank">http://www.mediafire.com</a>
Read More...

Hiển thị danh ngôn ngẫu nhiên bằng PHP trên blogspot


Cũng như ngôn ngữ Javascript, mình đến với PHP chỉ bằng con đường tự mày mò nghiên cứu trong những thời gian rảnh rỗi và chưa từng trải nghiệm qua bất kỳ khóa học nào. Quả thật, PHP không dễ cảm thụ, nhưng mình nghĩ các bạn có thể học được nếu có lòng kiên trì và đam mê. Hy vọng qua những ví dụ từ dễ đến khó được ứng dụng trên nền tảng Blogspot, các bạn sẽ từng bước hiểu được tường tận về ngôn ngữ PHP.

Qua bài này, mình sẽ giúp bạn hiển thị những câu danh ngôn một cách ngẫu nhiên theo như DEMO bên dưới (nhấn F5 để thấy tác dụng).


Điều trước tiên là bạn cần có một hosting (có thể dùng free hosting như byethost.com để thử nghiệm). Mở công cụ Notepad trên máy tính của bạn rồi dán vào đó bằng đoạn code bên dưới rồi lưu file với tên là randomquotes.php.

    <?
    //////////////////////////////////////////////////////
    // PHP Random Quote Script for Blogspot applied by www.thuthuatblogger.info
    // Many thanks to http://davidmarotz.com/ for its original PHP code
    //////////////////////////////////////////////////////
    Header("content-type: application/x-javascript");
    $bgcolor = '#FFFFCC';
    $textcolor = 'black';
    $textcolor2 = 'brown';
    $textsize = '4';
    $textsize2 = '3';
    // Array Structure:  "Quote","Author"
    $allqts = array
        ("The Black Knight Always Triumphs!",
            "Monty Python",
        "I swear by my life and love of it that I will never live for the sake of<br>another man, nor ask another man to live for mine" ,
            "Atlas Shrugged",
        "It is clear that the individual who persecutes a man, his brother,<br> because he is not of the same opinion, is a monster",
            "Voltaire",
        "I agree that there is a natural aristocracy among men<br>The grounds of this are virtue and talents.",
            "Thomas Jefferson",
        "Liberty, when it begins to take root, is a plant of rapid growth.",
            "George Washington",
        "Never argue with an idiot. <br>They drag you down to their level <br>then beat you with experience",
            "Dilbert",
        "The Answer is 42. What is the question?",
            "Hitchikers Guide to the Galaxy",
        "Anyone who has never made a mistake has never tried anything new",
            "Albert Einstein",
        "Progress doesn't come from early risers, progress is made<br>by lazy men looking for easier ways to do things.",
            "Lazarus Long <font size=-2>(Time Enough for Love by Robert A. Heinlein)</font>",
        "Throughout history, poverty is the normal condition of man. <br>Advances which permit this norm to be exceeded - here and there, now and then - <br>are the work of an extremely small minority, frequently despised,<br> often condemned, and almost always opposed by all right-thinking people. <br>Whenever this tiny minority is kept from creating, or (as sometimes happens)<br> is driven out of a society, the people then slip back into abject poverty.<br><br>This is known as 'bad luck.'",
            "Robert Heinlein",
        "A little learning is a dangerous thing; Drink deep, or taste not the<br>Pierian spring.  There shallow draughts intoxicate the brain, <br>and drinking largely sobers us again",
            "Alexander Pope",
        "The early bird gets the worm, but the second mouse gets the cheese",
            "Anonymous",
        "Subjugating the enemy's army without fighting is the true pinnacle of excellence",
            "Sun-tzu, The Art of War",
        "Work as though you were to live 100 years; pray as if you were to die tomorrow",
            "Benjamin Franklin",
        "The world is a stage, but the play is badly cast",
            "Oscar Wilde",
        "Truth is generally the best vindication against slander.",
            "Abraham Lincoln",
        "...mercy to the guilty is cruelty to the innocent...",
            "Adam Smith",
        "...I wish that I may never think the smiles of the great and powerful<br> a sufficient inducement to turn aside from the straight path<br> of honesty and the convictions of my own mind",
            "David Ricardo",
        "Democracy is the worst form of government except for all the others",
            "Winston Churchill",
        "You can only know the highest peaks if you have experianced the lowest valley's",
                "Richard Nixon",
        "They dress the wound of my people as though it were not serious. <br>'Peace, peace,' they say, when there is no peace.",
            "Jeremiah 6:14",
        "It is better to remain silent and be thought a fool<br> than to open your mouth and remove all doubt.",
            "Jonathan Swift",
        "The market system delivers the goods people want,<br>but those who make it work cannot readily explain why it is so.<br>The socialst or communist system does not deliver the goods, <br>but those who operate it can readily explain away its failure.",
            "F.A. Hayek, Law, Legislation and Liberty, Vol. II",
        "Never Stop Exploring<sup>tm</sup>",
            "The North Face"
            );
    // Gets the Total number of Items in the array
    //  Divides by 2 because there is a Quote followed by an Author
    $totalqts = (count($allqts)/2);
    // Subtracted 1 from the total because '0' is not accounted for otherwise
    $nmbr = (rand(0,($totalqts-1)));
    $nmbr = $nmbr*2;
    //$nmbr = 18;
    $quote = $allqts[$nmbr];
             $nmbr = $nmbr+1;
    $author = $allqts[$nmbr];
    $space = "<font color=$bgcolor>.....................................</font>";
    echo "document.write(\"<center><font color=$textcolor size='$textsize'><i>$quote</i></font><br>$space<font color=$textcolor2 size='$textsize2'>$author</font></center>\")";
    ?>

Trong đoạn code trên, bạn có thể thay thế những câu danh ngôn tiếng Anh bằng những câu danh ngôn tiếng Việt tương ứng, thêm hoặc bớt tùy ý theo đúng định dạng. Chú ý dùng <br> để xuống dòng cho câu văn.

Upload file randomquotes.php lên hosting của bạn để sử dụng.

Để hiển thị danh ngôn thì bạn đặt trong bài viết Blogspot hoặc tiện ích HTML/Javascript bằng dòng code như sau:

    <script type="text/javascript" src="http://www.tenmienhostingcuaban.com/randomquotes.php"></script>
Read More...

Danh sách các trang cung cấp template miễn phí tốt nhất

Khi làm blog ai cũng muốn blog của mình có giao diện đẹp để có thể thu hút sự quan tâm của đọc giả, Nhưng bạn không phải designer, việc thiết kế giao diện blog rất khó khăn và tốn nhiều thời gian để tự design cho mình một template ưng ý. Rất may mắn, chúng ta vẫn có thể nhờ vào một số trang cung cấp template miễn phí rất đẹp mắt.
 
Mình xin giới thiệu với các bạn 23 trang cung cấp template miễn phí cho blogger:

1. Premium Blogger Templates


Cách thay template cho blogspot - Free template cho blogspot - Template đẹp nhất - by namkna.blogspot.com

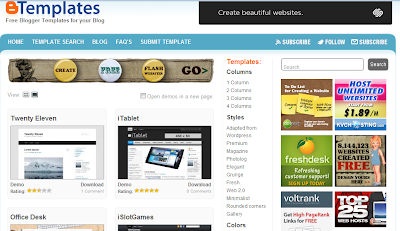
2. BTemplates

Cách thay template cho blogspot - Free template cho blogspot - Template đẹp nhất - by namkna.blogspot.com

3. Blog Template 4u


4. Zoom Template


5. Deluxe Templates


6. Best Theme


7. Blogger Themes


8. Blogcrowds


9. Themecraft


10. Blogger Templates Free


11. AllBlogTools


12. Blogger Styles


13. Blogger Template Place


14. Blogger Theme


15. Dhe Template


16. Templates Block


17. AnshulDudeja


18. Our Blogger Templates


19. Chicablogger


20. Buy My Themes


21. Splashy Templates


22. Xml Blogger Templates


23. Lovely Templates

Cách thay template cho blogspot - Free template cho blogspot - Template đẹp nhất
Phần Tiếp Theo Cũng Tương Đối Quang trọng đó là chách thay thêm vào Blog:
Sau khi tải về các bạn tải về ta chỉ quan tâm tới file có đuôi Html hình dạng như sau:
Free template cho blogspot - Template đẹp nhất
Sau đó các bạn đăng nhập vào Blogspot chọn Thiết kế - Chỉnh sửa HTML sau đó chọn chữ Duyệt (Bourse) và chỉ đường dẫn đến file vừa tải về sau đó ấn nút Tải lên (Upload) Chú ý trước khi tải File đó lên bạn ấn vào chữ "Tải xuống mẫu đầy đủ" để lưu mẫu cũ phòng bất trắc:))
Cách thay template cho blogspot - Free template cho blogspot - Template đẹp nhất
Chú ý trong quá trình tải mẫu HTMT mới từ máy lên đó chỉ là dạng cơ bản chưa điền các thông số (như một chiếc xe mới ở cửa hàng chưa đăng ký tên mình) do vậy bạn cần diều chỉnh một số thông số bên trong đó lại cho phù hợp với blog. Khi tải lên nếu có hỏi bạn muốn giữ lại các Mẫu cũ không bạn chọn giữ lại hết
Nếu không thích mẫu mới bạn có thể tải lại mẫu dự phòng mà bạn vừa tải xuống là Blog lại trở lại nguyên dạng như ban đầu

Nguồn : namkna.tk
Read More...

Chèn nhạc vào blog - Cách chèn playlist "nhạc của tui" vào blog

Thật ra cách chèn nhạc rất đơn giản, vì các website phát nhạc đã hỗ trợ code để chúng ta có thể chèn nhạc vào blog hay website.

VD: Để chèn một playlist có trình phát nhạc mình làm như sau:

1. Đăng ký 1 tài khoản trên http://nhaccuatui.com
2. Đăng nhập vào tài khoản vừa tạo và tạo 1 playlist bằng cách thêm từng bài hát yêu thích vào Playlist
3. Di chuột vào chữ "Nghe nhạc của tui" góc trên bên phải rồi chọn playlist muốn thêm vào blog
4.Copy code ở dòng "Copy vào blog" có dạng :

<object width="300" height="400">  <param name="movie" value="http://www.nhaccuatui.com/l/BSc2RmfM10cP" />  <param name="quality" value="high" />  <param name="wmode" value="transparent" />  <param name="allowscriptaccess" value="always" />  <param name="flashvars" value="&autostart=false" />  <embed src="http://www.nhaccuatui.com/l/BSc2RmfM10cP" flashvars="target=blank&autostart=false" allowscriptaccess="always" quality="high" wmode="transparent" type="application/x-shockwave-flash" width="300" height="400"></embed></object>

Có 3 tùy chọn:
- Bình thường : Trình phát nhạc sẽ chơi nhạc sau khi ấn Play
- Tự động play : Khi vào web, trình phát nhạc tự động chơi nhạc
- Nhạc nền : Trình phát nhạc được ẩn và tự động chơi nhạc

5. Tạo 1 widget và "Paste" vào
6. Ấn "Lưu"

Vậy là chúng ta đã có 1 trình chơi nhạc với những bài hát yêu thích
Read More...

Thêm tiện ích "Recent comments" cho Blogspot

 
Hiện nay Blogger đã có chức năng này rồi, nhưng với code này ta sẽ chỉnh sữa được nhiều hơn cho ưng ý và phù hợp với blog. Đặc biệt là cập nhật thay đổi nhanh hơn so với tiện ích của Blogger.
Thủ thuật blog: Thêm tiện ích "Recent comments" cho Blogspot


Giới thiệu: Hiện nay Blogger đã có chức năng này rồi, nhưng với code này ta sẽ chỉnh sữa được nhiều hơn cho ưng ý và phù hợp với blog. Đặc biệt là cập nhật thay đổi nhanh hơn so với tiện ích của Blogger.


CÁCH THỰC HIỆN

1. Đăng nhập Blogger Dashboard (Bảng điều khiển)
2. Chọn: Design (Thiết kế) > Edit HTML (Chỉnh sữa HTML)
3. Không cần đánh dấu chọn ô: Expand Widget Templates (Mở rộng mẫu tiện ích)

4. Chèn script

Bước 1: Tìm dòng ]]></b:skin>

- Chèn dưới nó đoạn code CSS sau:

/*Thêm tiện ích "Recent comments" (1)*/
/*Tùy chỉnh phần tên người Recent comments */
.recommment-author {
    font-size:12px;
    margin-top:8px;
    font-weight: bold;
}
.recommment-author a{
    color:#0F0FAF;
    padding-left:0px;
    border-bottom:0px dashed #000;
}
.recommment-author a:hover{color:#;}

/* Tùy chỉnh phần tóm tắt nội dung Recent comments */
.re-sumpost {
    font:13px Tahoma; 
    margin-bottom:20px; 
    border-left:0px solid #000; 
    border-bottom:1px dashed #000; 
    padding:2px; 
    color:#;
    line-height: 15px;
}
.re-sumpost a{color:#3366ff;}
.re-sumpost a:hover{color:#339966;}

/* Tùy chỉnh phần ngày Recent comments */
.date-commment{
    font-size:9px;
    color:#339966; 
    padding:2px;
    border-left:0px solid #000; 
}

Có thể tùy chỉnh thêm các class trong đoạn code trên như đường viền, màu nền,...
Và chỉnh canh lề, màu chữ, kích cỡ, font,... cho phù hợp với blog bạn.


Bước 2: Save template. (Lưu mẫu)


Bước 3: Thêm widget

Design (Thiết kế) > Page Elements (Chỉnh sữa trang) > Add a Gadget (Thêm tiện ích)

- Chọn thêm tiện ích HTML/Javascript và dán đoạn mã sau vào:

<!-- Thêm tiện ích "Recent comments" (2) -->
<script style="text/javascript">
function showrecentcomments(json) {
var numcomments = 5; // Số comment hiển thị trong tiện ích
var showcommentdate = true; // Không muốn hiển thị ngày comment thì thay True thành False
var showposttitle = true; // Không muốn hiển thị tiêu đề bài viết thì thay True thành False
var numchars = 100; // Số từ tóm tắt nội dung comment
for (var i = 0; i < numcomments; i++) {
var entry = json.feed.entry[i];
var alturl;
if (i == json.feed.entry.length) break;
for (var k = 0; k < entry.link.length; k++) {
if (entry.link[k].rel == 'alternate') {
alturl = entry.link[k].href;
break;
}}
alturl = alturl.replace("#", "#comment-");
var postlink = alturl.split("#");
postlink = postlink[0];
var linktext = postlink.split("/");
linktext = linktext[5];
linktext = linktext.split(".html");
linktext = linktext[0];
var posttitle = linktext.replace(/-/g," ");
posttitle = posttitle.link(postlink);
var commentdate = entry.published.$t;
var cdyear = commentdate.substring(0,4);
var cdmonth = commentdate.substring(5,7);
var cdday = commentdate.substring(8,10);
var monthnames = new Array();
monthnames[1] = "Jan";
monthnames[2] = "Feb";
monthnames[3] = "Mar";
monthnames[4] = "Apr";
monthnames[5] = "May";
monthnames[6] = "Jun";
monthnames[7] = "Jul";
monthnames[8] = "Aug";
monthnames[9] = "Sep";
monthnames[10] = "Oct";
monthnames[11] = "Nov";
monthnames[12] = "Dec";
if ("content" in entry) {
var comment = entry.content.$t;}
else
if ("summary" in entry) {
var comment = entry.summary.$t;}
else var comment = "";
var re = /<\S[^>]*>/g;
comment = comment.replace(re, "");
document.write('');
if (showcommentdate == true)
document.write('<div class="recommment-author"><a href="' + alturl + '">' + entry.author[0].name.$t + '</a> said...</div>');
document.write('<div class="date-commment"> On ' + monthnames[parseInt(cdmonth,10)] + ' ' + cdday + ', ' + cdyear + ' ');
if (showposttitle == true) document.write(' on ' + posttitle);
document.write('</div>');
if (comment.length < numchars) {
document.write('<div class="re-sumpost">');
document.write(comment);
document.write('</div>');}
else
{
document.write('<div class="re-sumpost">');
comment = comment.substring(0, numchars);
var quoteEnd = comment.lastIndexOf(" ");
comment = comment.substring(0, quoteEnd);
document.write(comment + '... <a href="' + alturl + '"> Đọc tiếp... </a>');
document.write('</div>');}
document.write('');
}
document.write('');
}
</script>
<script src="http://caytamgui.blogspot.com/feeds/comments/default?alt=json-in-script&callback=showrecentcomments">
</script>

Thay địa chỉ http://caytamgui.blogspot.com thành địa chỉ web của bạn.


Bước 4: Save. (Lưu)

THE END.
Read More...

Tạo bài viết liên quan cho blog (Related Posts)


Tiện ích cho phép hiển thị các bài viết liên quan (có cùng nhãn) ở cuối mỗi bài viết. Thủ thuật có sử dụng CSS để làm cho tiện ích trông bắt mắt hơn. Ngoài ra, cũng để khách viếng thăm dễ theo dõi chủ đề liên quan hơn.
Thủ thuật blog: Tạo bài viết liên quan cho blog (Related Posts)


Giới thiệu: Tiện ích cho phép hiển thị các bài viết liên quan (có cùng nhãn) ở cuối mỗi bài viết. Thủ thuật có sử dụng CSS để làm cho tiện ích trông bắt mắt hơn. Ngoài ra, cũng để khách viếng thăm dễ theo dõi chủ đề liên quan hơn.

CÁCH THỰC HIỆN
1. Đăng nhập Blogger Dashboard (Bảng điều khiển)
2. Chọn: Design (Thiết kế) > Edit HTML (Chỉnh sữa HTML)
3. Đánh dấu chọn ô: Expand Widget Templates (Mở rộng mẫu tiện ích)

4. Chèn script

Bước 1: Tìm thẻ đóng </head>

- Thêm vào trước nó đoạn code sau:

<!-- Widget bài viết liên quan (1) -->
<style>
/*Khung chính của bài viết liên quan*/
#related-posts {
    float:left;
    min-width: 100%;
    margin: 30px 5px 30px 0;
    font: 11px Tahoma;
}

#related-posts .widget { 
    List-style-type: none;
    margin: 5px 0 5px 0;
    padding: 0;
}

#related-posts .widget h2, #related-posts h2 {
    color: #940f04; 
    font-size: 20px;
    font-weight: normal;
    margin: 5px 7px 0;
    padding: 0 0 5px;
}

/*Màu link của bài viết liên quan*/
#related-posts a {
    color: #318686;
    font-size: 13px;
    text-decoration: none;
}

/*Màu link khi rê chuột vào*/
#related-posts a:hover {
    color: #C4436A;
    text-decoration: underline;
}

#related-posts ul {
    border: medium none;
    margin: 10px;
    padding: 0;
}

#related-posts ul li {
    display: block;
    background: url(https://blogger.googleusercontent.com/img/b/R29vZ2xl/AVvXsEgTQp4zCK2iUrDKFJB-2k0MCGofFV9xFSXwKsnmmoKDHOanlWFFMjBvqguQjJXLt0Ox4yrtBnQg6Se8tKXWthCYfcSl09fjjo6Wrw2Sl3WLbHIElmhNWMnookV-bQjnHpgD026aUMG9-Tlz/) no-repeat 0 0;
    margin: 0;
    padding: 0 0 1px 16px;
    margin-bottom: 5px;
    line-height: 2em;
    border-bottom:1px dotted #cccccc; /*Gạch đích dưới mỗi link bài viết liên quan*/
}
</style>

<script type='text/javascript'>
//<![CDATA[
var relatedTitles = new Array();
var relatedTitlesNum = 0;
var relatedUrls = new Array();
function related_results_labels(json) {
for (var i = 0; i < json.feed.entry.length; i++) {
var entry = json.feed.entry[i];
relatedTitles[relatedTitlesNum] = entry.title.$t;
for (var k = 0; k < entry.link.length; k++) {
if (entry.link[k].rel == 'alternate') {
relatedUrls[relatedTitlesNum] = entry.link[k].href;
relatedTitlesNum++;
break;
}
}
}
}
function removeRelatedDuplicates() {
var tmp = new Array(0);
var tmp2 = new Array(0);
for(var i = 0; i < relatedUrls.length; i++) {
if(!contains(tmp, relatedUrls[i])) {
tmp.length += 1;
tmp[tmp.length - 1] = relatedUrls[i];
tmp2.length += 1;
tmp2[tmp2.length - 1] = relatedTitles[i];
}
}
relatedTitles = tmp2;
relatedUrls = tmp;
}
function contains(a, e) {
for(var j = 0; j < a.length; j++) if (a[j]==e) return true;
return false;
}
function printRelatedLabels() {
var r = Math.floor((relatedTitles.length - 1) * Math.random());
var i = 0;
document.write('<ul>');
while (i < relatedTitles.length && i < 20) {
document.write('<li><a href="' + relatedUrls[r] + '">' + relatedTitles[r] + '</a></li>');
if (r < relatedTitles.length - 1) {
r++;
} else {
r = 0;
}
i++;
}
}
//]]>
</script>


Bước 2: Tìm dòng <data:post.body/>

- Thêm vào sau nó đoạn code sau:

<!-- Widget bài viết liên quan (2) -->
<b:if cond='data:blog.pageType == "item"'>
<div id="related-posts">

  <div style='border-top:#AAAE95 1px dashed; margin: 0 50px 0 50px; padding-top:30px;'/>
<font face='Arial' size='3'><b>Bài viết liên quan: </b></font>

<font color='#FF0000'> <!-- Màu chữ label -->
<b:loop values='data:post.labels' var='label'> 
<data:label.name/> <!--Dòng code hiện label kế bên bài viết liên quan-->
<b:if cond='data:label.isLast != "true"'>
, <!--Dấu phẩy ngăn cách các label -->
</b:if>
<b:if cond='data:blog.pageType == "item"'>

<script expr:src='"/feeds/posts/default/-/" + data:label.name + "?alt=json-in-script&amp;callback=related_results_labels&amp;max-results=8"' type='text/javascript'/>
</b:if>
</b:loop>
</font>
<script type='text/javascript'>
removeRelatedDuplicates();
printRelatedLabels();
</script>
</div>
</b:if>

max-results=8 // Số bài viết liên quan hiển thị

Lưu ý: Đối với những blog có tiện ích đọc thêm (Read more...) thì việc bạn đặt code trên trước hay sau code của link Readmore đều không quan trọng (do 2 tiện ích này không thể xuất hiện chung trên một trang), quan trọng là các code này phải được đặt sau dòng <data:post.body/>


Bước 3: Save template. (Lưu mẫu)

THE END.
Read More...

Chèn ảnh luôn hiện ở phía trước mặt Blog

Khi thực hiện điều này các hình ảnh được chèn sẽ luôn luôn xuất hiện ở phía trước mặt của blog của bạn, hình ảnh sẽ luôn luôn xuất hiện ngay cả khi người xem di chuyển chuột (lên, xuống) trong blog của bạn.
 
Thủ thuật blog: Chèn ảnh luôn hiện ở phía trước mặt Blog


Giới thiệu: Khi thực hiện điều này các hình ảnh được chèn sẽ luôn luôn xuất hiện ở phía trước mặt của blog của bạn, hình ảnh sẽ luôn luôn xuất hiện ngay cả khi người xem di chuyển chuột (lên, xuống) trong blog của bạn.


CÁCH THỰC HIỆN

1. Đăng nhập Blogger Dashboard (Bảng điều khiển)
2. Chọn: Design (Thiết kế) > Edit HTML (Chỉnh sữa HTML)
3. Không cần đánh dấu chọn ô: Expand Widget Templates (Mở rộng mẫu tiện ích)

4. Chèn script

Bước 1: Tìm dòng ]]></b:skin>

- Thêm vào trước nó đoạn code sau:

/*Chèn hình cố định (1)*/
#top_image {
position:fixed;
_position:absolute;

bottom:5px; /*Vị trí hình trên blog*/
right:5px;     /*Vị trí hình trên blog*/ 

clip:inherit;
_top:expression(document.documentElement.scrollTop+
document.documentElement.clientHeight-this.clientHeight);
_left:expression(document.documentElement.scrollLeft+ document.documentElement.clientWidth – offsetWidth); }

Bước 2: Tìm thẻ đóng </body>

- Thêm vào trước nó đoạn code sau:

<!--Chèn hình cố định (2) -->
<div id='top_image'>
<img src= "LINK_HÌNH_CỐ_ĐỊNH"/>
</div>


Bước 3: Save template. (Lưu mẫu)

THE END.
Read More...

Cách ẩn widget tại trang chủ hay trang riêng biệt

Thủ thuật blog cho phép ẩn widget (tiện ích) tại trang chủ, trang nhãn, trang lưu trữ, hay một trang riêng biệt nào đó. Tùy theo nhu cầu của bạn muốn ẩn ở trang nào.


Muốn ẩn một tiện ích hoặc một thành phần nào đó thì ta phải xác định được ID hoặc class của nó. Các ID thông thường trong blogspot như là: HTML1, HTML2, HTML3, …, Label1, Label2, Label3, …, BlogList1, Followers1, Blog1, BlogArchive1, Profile1, header-wrapper, sidebar, main-wrapper, footer-wrapper, comments, comments-block, …

Các ID khi đưa vào CSS có dấu # ở phía trước, ví dụ: #HTML1. Các class thường gặp trong blogspot như: header-outer, main-outer, footer-outer, post-body, post-footer, …

Các class khi đưa vào CSS có dấu “.” (dấu chấm) ở phía trước, ví dụ: .header-outer.


CÁCH THỰC HIỆN

1. Đăng nhập Blogger Dashboard (Bảng điều khiển)
2. Chọn: Design (Thiết kế) > Edit HTML (Chỉnh sữa HTML)
3. Không cần đánh dấu chọn ô: Expand Widget Templates (Mở rộng mẫu tiện ích)

4. Chèn script

Bước 1: Tìm dòng ]]></b:skin>

Bước 2: Thêm vào sau nó một trong các đoạn code sau:
(Nhớ thay chữ “ID widget” thành ID của widget bạn muốn ẩn)

1. Ẩn widget ở trang chủ

<!--Ẩn widget ở trang chủ-->
<b:if cond='data:blog.url == data:blog.homepageUrl'>
<style type='text/css'>
#ID_widget {display:none !important;visibility:hidden !important}
</style>
</b:if>

2. Ẩn nhiều widget ở trang chủ

<!--Ẩn nhiều widget ở trang chủ -->
<b:if cond='data:blog.url == data:blog.homepageUrl'>
<style type='text/css'>
#ID_widget , #ID_widget, #ID_widget {display:none !important;visibility:hidden !important}
</style>
</b:if>

3. Ẩn widget ở bài viết

<!-- Ẩn widget ở bài viết -->
<b:if cond='data:blog.pageType == "item"'>
<style type='text/css'>
#ID_widget {display:none !important;visibility:hidden !important}
</style>
</b:if>

4. Ẩn widget ở trang chủ, trang nhãn

<!-- Ẩn widget ở trang chủ, trang nhãn -->
<b:if cond='data:blog.pageType == "index"'>
<style type='text/css'>
#ID_widget {display:none !important;visibility:hidden !important}
</style>
</b:if>

5. Ẩn widget ở các trang lưu trữ

<!-- Ẩn widget ở các trang lưu trữ -->
<b:if cond='data:blog.pageType == "archive"'>
<style type='text/css'>
#ID_widget {display:none !important;visibility:hidden !important}
</style>
</b:if>

6. Ẩn widget ở các trang tĩnh

<!-- Ẩn widget ở các trang tĩnh -->
<b:if cond='data:blog.pageType == "static_page"'>
<style type='text/css'>
#ID_widget {display:none !important;visibility:hidden !important}
</style>
</b:if>

7. Ẩn widget ở một trang riêng biệt nào đó

<!-- Ẩn widget ở một trang riêng biệt nào đó -->
<b:if cond='data:blog.url == "URL_của_trang_riêng_biệt"'>
<style type='text/css'>
#ID_widget {display:none !important;visibility:hidden !important}
</style>
</b:if>

8. Chỉ hiện widget ở trang bài viết

<!-- Chỉ hiện widget ở trang bài viết -->
<b:if cond='data:blog.pageType != "item"'>
<style type='text/css'>
#ID_widget {display:none !important;visibility:hidden !important}
</style>
</b:if>

Lưu ý: Nếu thay == thành != thì kết quả sẽ ngược lại - nghĩa là không ẩn mà chỉ hiện các widget ở các trang lựa chọn ở trên và ẩn ở các trang còn lại.


Bước 3: Save template. (Lưu mẫu)

THE END.
Read More...

Lazyload Jquery làm mượt ảnh và ảnh sẽ load nhanh hơn

Thủ thuật blog : Làm mượt ảnh và ảnh sẽ load nhanh hơn

Kéo tới đâu ảnh mới bắt đầu load tới đó, giảm thời gian tải ảnh. Mặc định blog khi load, sẽ load tất cả các ảnh và thành phần có trong blog. Điều này sẽ làm chậm blog nếu web hay blog có nhiều ảnh. Nhưng với lazyload thì chỉ load những ảnh lọt trong tầm mắt người nhìn.


Ngoài ra, còn có thêm hiệu ứng tải ảnh kiểu “Fade in”, khi hiện ảnh trông rất đẹp và chuyên nghiệp.

Lưu ý: Lazyload sẽ được load sau cùng, sau khi đã load hết các mã Java, js, HTML của website hay blog.


CÁCH THỰC HIỆN

1. Đăng nhập Blogger Dashboard (Bảng điều khiển)
2. Chọn: Design (Thiết kế) > Edit HTML (Chỉnh sữa HTML)
3. Không cần đánh dấu chọn ô: Expand Widget Templates (Mở rộng mẫu tiện ích)

4. Chèn script

Bước 1: Yêu cầu phải có jQuery. (Có rồi thì bỏ qua)


1. Tải về máy một trong ba phiên bản jQuery sau: 1.3.1 | 1.3.2 | 1.4.3

2. Up lên host cho link direct.

- Gợi ý: Dùng host của google: http://code.google.com/
- Hướng dẫn: Here
- Sau khi up lên host, thì lấy link vừa up.

3. Tìm thẻ <head>

- Thêm vào dưới nó đoạn code sau:
(Nhớ thay jQuery.JS bằng link mới bạn vừa up lên host)

<script src='jQuery.JS' type='text/javascript'/>


* jQuery phải để nằm trên code của bước 2, lazyload mới hoạt động nhé!


Bước 2: Tìm thẻ đóng </head>

- Thêm vào trước nó đoạn code sau:

<!-- Lazy load -->
<script type='text/javascript'>
//<![CDATA[
(function($) {

    $.fn.lazyload = function(options) {
        var settings = {
            threshold    : 0,
            failurelimit : 0,
            event        : "scroll",
            effect       : "show",
            container    : window
        };
                
        if(options) {
            $.extend(settings, options);
        }

        /* Fire one scroll event per scroll. Not one scroll event per image. */
        var elements = this;
        if ("scroll" == settings.event) {
            $(settings.container).bind("scroll", function(event) {
                
                var counter = 0;
                elements.each(function() {
                    if ($.abovethetop(this, settings) ||
                        $.leftofbegin(this, settings)) {
                            /* Nothing. */
                    } else if (!$.belowthefold(this, settings) &&
                        !$.rightoffold(this, settings)) {
                            $(this).trigger("appear");
                    } else {
                        if (counter++ > settings.failurelimit) {
                            return false;
                        }
                    }
                });
                /* Remove image from array so it is not looped next time. */
                var temp = $.grep(elements, function(element) {
                    return !element.loaded;
                });
                elements = $(temp);
            });
        }
        
        this.each(function() {
            var self = this;
            
            /* Save original only if it is not defined in HTML. */
            if (undefined == $(self).attr("original")) {
                $(self).attr("original", $(self).attr("src"));     
            }

            if ("scroll" != settings.event || 
                    undefined == $(self).attr("src") || 
                    settings.placeholder == $(self).attr("src") || 
                    ($.abovethetop(self, settings) ||
                     $.leftofbegin(self, settings) || 
                     $.belowthefold(self, settings) || 
                     $.rightoffold(self, settings) )) {
                        
                if (settings.placeholder) {
                    $(self).attr("src", settings.placeholder);      
                } else {
                    $(self).removeAttr("src");
                }
                self.loaded = false;
            } else {
                self.loaded = true;
            }
            
            /* When appear is triggered load original image. */
            $(self).one("appear", function() {
                if (!this.loaded) {
                    $("<img />")
                        .bind("load", function() {
                            $(self)
                                .hide()
                                .attr("src", $(self).attr("original"))
                                [settings.effect](settings.effectspeed);
                            self.loaded = true;
                        })
                        .attr("src", $(self).attr("original"));
                };
            });

            /* When wanted event is triggered load original image */
            /* by triggering appear.                              */
            if ("scroll" != settings.event) {
                $(self).bind(settings.event, function(event) {
                    if (!self.loaded) {
                        $(self).trigger("appear");
                    }
                });
            }
        });
        
        /* Force initial check if images should appear. */
        $(settings.container).trigger(settings.event);
        
        return this;

    };

    /* Convenience methods in jQuery namespace.           */
    /* Use as  $.belowthefold(element, {threshold : 100, container : window}) */

    $.belowthefold = function(element, settings) {
        if (settings.container === undefined || settings.container === window) {
            var fold = $(window).height() + $(window).scrollTop();
        } else {
            var fold = $(settings.container).offset().top + $(settings.container).height();
        }
        return fold <= $(element).offset().top - settings.threshold;
    };
    
    $.rightoffold = function(element, settings) {
        if (settings.container === undefined || settings.container === window) {
            var fold = $(window).width() + $(window).scrollLeft();
        } else {
            var fold = $(settings.container).offset().left + $(settings.container).width();
        }
        return fold <= $(element).offset().left - settings.threshold;
    };
        
    $.abovethetop = function(element, settings) {
        if (settings.container === undefined || settings.container === window) {
            var fold = $(window).scrollTop();
        } else {
            var fold = $(settings.container).offset().top;
        }
        return fold >= $(element).offset().top + settings.threshold  + $(element).height();
    };
    
    $.leftofbegin = function(element, settings) {
        if (settings.container === undefined || settings.container === window) {
            var fold = $(window).scrollLeft();
        } else {
            var fold = $(settings.container).offset().left;
        }
        return fold >= $(element).offset().left + settings.threshold + $(element).width();
    };
    /* Custom selectors for your convenience.   */
    /* Use as $("img:below-the-fold").something() */

    $.extend($.expr[':'], {
        "below-the-fold" : "$.belowthefold(a, {threshold : 0, container: window})",
        "above-the-fold" : "!$.belowthefold(a, {threshold : 0, container: window})",
        "right-of-fold"  : "$.rightoffold(a, {threshold : 0, container: window})",
        "left-of-fold"   : "!$.rightoffold(a, {threshold : 0, container: window})"
    });
    
})(jQuery);
//]]>
</script>

<script type="text/javascript" charset="utf-8">
   $(function() {        
 
    $("img") // img là áp dụng với cả blog. Nếu chỉ muốn áp dụng cho một class nào đó thì thêm class đó vào trước img. Ví dụ: .post img, #content img, .comments img,… 

.lazyload({
    placeholder : "LINK_HÌNH", /*Hình thay thế khi ảnh chưa load xong*/
    effect: "fadeIn" /* Hiệu ứng mờ khi ảnh xuất hiện. Có thể sử dụng các hiệu ứng khác như: slideUp, slideDown,…*/

 });
});
</script>

* Các tính năng thêm. Thêm vào sau dòng: effect: "fadeIn"

threshhold:100 /*Số pixel của ảnh được tải trước*/
container: $("class") /*Dùng cho class scroll được. Thay thành class bạn muốn áp dụng. 
Ví dụ: #container, #scroll, .imagescroll,…*/


Bước 3: Save template. (Lưu mẫu)


Một số mẫu hình thay thế


THE END.
Read More...

Hiệu ứng hoa, lá, tuyết rơi,... trên nền blog

Ảnh minh họa
Nếu một ngày bạn thấy blog mình quá đơn điệu, và muốn thêm một chút sinh khí cho blog, như tuyết rơi trên blog, lá rơi, hoa rơi,… thì thủ thuật sau sẽ giúp bạn việc này. Thủ thuật thích hợp cho những ai muốn làm đẹp hơn cho blog.

Lưu ý: Ở lần load trang đầu tiên, ảnh sẽ rơi một lượt từ đầu trang cho đến cuối trang thì mới rơi tiếp lại từ đầu. Sau đó sẽ rơi liên tục, đều đặn và riêng lẻ, trông sẽ tự nhiên hơn và đẹp hơn lần rơi đầu tiên.


CÁCH THỰC HIỆN

1. Đăng nhập Blogger Dashboard (Bảng điều khiển)
2. Chọn: Design (Thiết kế) > Page Elements (Chỉnh sữa trang) > Add a Gadget (Thêm tiện ích)

- Chọn thêm tiện ích HTML/Javascript và dán đoạn mã sau vào:


<!-- Hiệu ứng hoa, lá, tuyết rơi,... cho blog -->
<script type='text/javascript'>
//<![CDATA[
  var snowsrc="LINK HÌNH" // Thay Link hình của bạn vào đây
  var no = 20; // Số ảnh rơi trên blog
  var hidesnowtime = 0; // Số giây ảnh biến mất sau khi rơi
  var snowdistance = "pageheight"; // Có thể thay đổi giá trị pageheight thành windowheight 

///////////Stop Config//////////////////////////////////

  var ie4up = (document.all) ? 1 : 0;
  var ns6up = (document.getElementById&&!document.all) ? 1 : 0;

 function iecompattest(){
 return (document.compatMode && document.compatMode!="BackCompat")? document.documentElement : document.body
 }

  var dx, xp, yp;    // coordinate and position variables
  var am, stx, sty;  // amplitude and step variables
  var i, doc_width = 800, doc_height = 600; 
  
  if (ns6up) {
    doc_width = self.innerWidth;
    doc_height = self.innerHeight;
  } else if (ie4up) {
    doc_width = iecompattest().clientWidth;
    doc_height = iecompattest().clientHeight;
  }

  dx = new Array();
  xp = new Array();
  yp = new Array();
  am = new Array();
  stx = new Array();
  sty = new Array();
  snowsrc=(snowsrc.indexOf("dynamicdrive.com")!=-1)? "snow.gif" : snowsrc
  for (i = 0; i < no; ++ i) {  
    dx[i] = 0;                        // set coordinate variables
    xp[i] = Math.random()*(doc_width-50);  // set position variables
    yp[i] = Math.random()*doc_height;
    am[i] = Math.random()*20;         // set amplitude variables
    stx[i] = 0.02 + Math.random()/10; // set step variables
    sty[i] = 0.7 + Math.random();     // set step variables
  if (ie4up||ns6up) {
      if (i == 0) {
        document.write("<div id=\"dot"+ i +"\" style=\"POSITION: absolute; Z-INDEX: "+ i +"; VISIBILITY: visible; TOP: 15px; LEFT: 15px;\"><a href=\"http://dynamicdrive.com\"><img src='"+snowsrc+"' border=\"0\"><\/a><\/div>");
      } else {
        document.write("<div id=\"dot"+ i +"\" style=\"POSITION: absolute; Z-INDEX: "+ i +"; VISIBILITY: visible; TOP: 15px; LEFT: 15px;\"><img src='"+snowsrc+"' border=\"0\"><\/div>");
      }
    }
  }

  function snowIE_NS6() {  // IE and NS6 main animation function
    doc_width = ns6up?window.innerWidth-10 : iecompattest().clientWidth-10;
  doc_height=(window.innerHeight && snowdistance=="windowheight")? window.innerHeight : (ie4up && snowdistance=="windowheight")?  iecompattest().clientHeight : (ie4up && !window.opera && snowdistance=="pageheight")? iecompattest().scrollHeight : iecompattest().offsetHeight;
    for (i = 0; i < no; ++ i) {  // iterate for every dot
      yp[i] += sty[i];
      if (yp[i] > doc_height-50) {
        xp[i] = Math.random()*(doc_width-am[i]-30);
        yp[i] = 0;
        stx[i] = 0.02 + Math.random()/10;
        sty[i] = 0.7 + Math.random();
      }
      dx[i] += stx[i];
      document.getElementById("dot"+i).style.top=yp[i]+"px";
      document.getElementById("dot"+i).style.left=xp[i] + am[i]*Math.sin(dx[i])+"px";  
    }
    snowtimer=setTimeout("snowIE_NS6()", 10);
  }

 function hidesnow(){
  if (window.snowtimer) clearTimeout(snowtimer)
  for (i=0; i<no; i++) document.getElementById("dot"+i).style.visibility="hidden"
 }
  
if (ie4up||ns6up){
    snowIE_NS6();
  if (hidesnowtime>0)
  setTimeout("hidesnow()", hidesnowtime*1000)
  }
//]]>
</script>

3. Save. (Lưu)


Một số mẫu hình ảnh cho blog

1. Tuyết
Dùng cho nền tối: | (snow 9px) | (snow 7px) | (snow 5px) | (snow 3px)

2. Tổng hợp

THE END.
Read More...

Download đấu trường thú 2

  • Đấu trường thú 2

  • Video Gallery